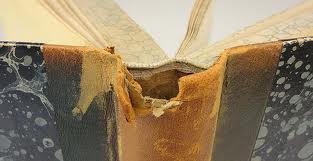
Having prepared the spine area of your book (previous posts), we can now use Method One to Reback With Book Cloth On The Outside Of The Original Book Cloth.
Constructing the Replacement Book Cloth Spine
- Make measurement A (the thickness of the text block from shoulder to shoulder). Add 1” to each side of the spine width in measurement A.
- Measure the height of the text block (Measurement B) and 1 l/2” to measurement B.
- Transfer measurement A and B to the book cloth. Be sure the-grain of the book cloth runs up and down the spine of the book then cut the book cloth.
- Center the new book cloth on the front book board so the same amount hangs over the top and bottom.
- Crease the top and bottom of the book cloth to mark the height of the finished spine.
- Center measurement A on each crease and mark.
- Cut V-slits at the crease line marks that correspond to the text block spine measurements.
- Cut a piece of acid-free paper to line and stiffen the book cloth spine. This liner is called the spine inlay. Sometimes two or more layers of acid-free bond are used for the spine liner. Always make sure the grain of the spine inlay runs in the same direction as the spine of the text block. If it does not, the book will not open easily.
- Place the spine inlay on a sheet of waste paper. Apply glue to the wrong side in the star burst pattern.
- Using the text block measurement marks and top and bottom creases, enter the spine inlay on the wrong side of the new spine cloth.
- Apply glue to the center section of the spine turn-in at the top and bottom of the spine cloth; fold them over, and rub them down with a folder.
- Protect the spine cloth with a piece of wax paper and place under weight to dry.
- Using an X-acto knife or scalpel and ruler, trim away the ragged edges of the original spine. The original spine should be slightly narrower than the text block spine, so the original cloth won’t interfere with the joint cloth of the replacement spine when the book opens and closes. Do not trim away any lettering or decoration. If the original spine is being re-used, save it.
- Lay the original spine or new label on a piece of waste paper wrong side up.
- Apply glue in a star burst pattern working from the center toward the edges.
- Center the original spine or new label on the right side-of the replacement spine. Cover it with a piece of waste paper, and rub it down with a folder. All the edges should be well adhered.
- Protect the spine cloth with a piece of wax paper, and place under weight to dry.